'ZDNET Recommends': What exactly does it mean?
ZDNET's recommendations are based on many hours of testing, research, and comparison shopping. We gather data from the best available sources, including vendor and retailer listings as well as other relevant and independent reviews sites. And we pore over customer reviews to find out what matters to real people who already own and use the products and services we’re assessing.
When you click through from our site to a retailer and buy a product or service, we may earn affiliate commissions. This helps support our work, but does not affect what we cover or how, and it does not affect the price you pay. Neither ZDNET nor the author are compensated for these independent reviews. Indeed, we follow strict guidelines that ensure our editorial content is never influenced by advertisers.
ZDNET's editorial team writes on behalf of you, our reader. Our goal is to deliver the most accurate information and the most knowledgeable advice possible in order to help you make smarter buying decisions on tech gear and a wide array of products and services. Our editors thoroughly review and fact-check every article to ensure that our content meets the highest standards. If we have made an error or published misleading information, we will correct or clarify the article. If you see inaccuracies in our content, please report the mistake via this form.
How to clean your Keurig coffee maker inside and out

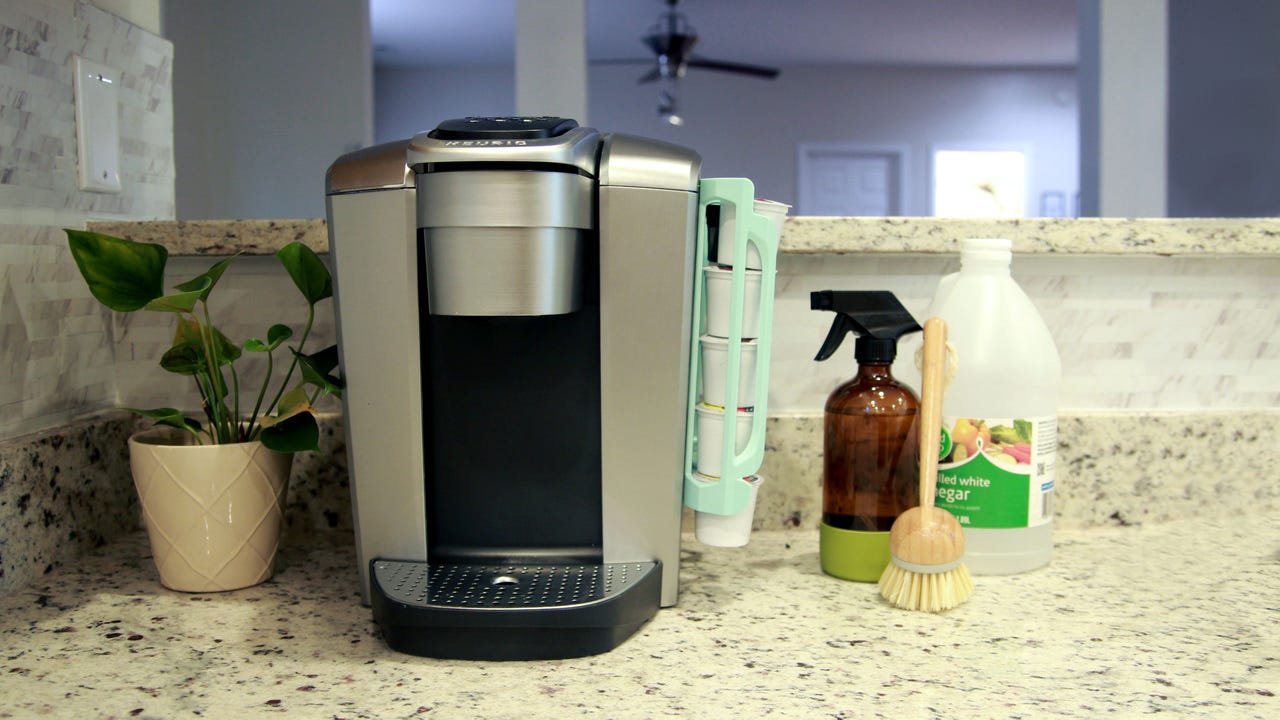
If you have a Keurig machine at home, you may have wondered what kind of sludge may have accumulated inside the coffee maker after brewing gallons of coffee.
ZDNET Recommends
Of course, you can choose avoid the topic, but then how would you know whether your coffee is dark due to the roast or as a result of all the potential grime in there? Or maybe you can just learn how to clean your Keurig.
Whether you use pods or reusable K Cups, a Keurig coffeemaker has many nooks and crannies where buildup and mold could hide, so it's important to keep it as clean as possible. Whatever runs through your Keurig may also end up in your body, after all.
How to clean your Keurig coffeemaker
Materials needed:
- Water
- White vinegar or descaling solution
- Dish soap and access to a sink
- A mug
Estimated time:
- About one hour
1. Wash all removable parts
A Keurig has several removable parts where old coffee grounds and spills can hide. Wash all removable parts with dish soap in the sink, including the water reservoir, mug base, pod holder, and milk steamer, if your machine has one.
The Keurig's pod holder is the cup-shaped enclosure where you put K-cups to brew the coffee. To remove the pod holder, open the lid on your Keurig and locate the needles. Then push the pod holder from the bottom upwards with your fingers until it pops out. Be very careful with the needles when removing the pod holder!
If you want to clean the needles on the brewer, you can use a pin or a paper clip to dislodge any grounds that may be slowing down your machine. I also wipe down the exterior of the brewer at this point.
The mug stand gets particularly dirty!
2. Empty water reservoir and fill with water and white vinegar
Empty your water reservoir and remove the filter. If your filter is over two months old, it's probably time to replace it with a new one after you finish cleaning your machine.
Fill the water reservoir halfway with white vinegar, then top it with water up to the fill line.
3. Run cycles until reservoir is empty
Place a large mug on the stand and run your Keurig through multiple 8-ounce cycles without inserting a K-Cup, until the water reservoir is empty of the cleaning solution.
All the old coffee grounds and mineral buildup inside of the brewer should start coming out into the mug. I found old grounds were still coming out of the Keurig even after the water reservoir was half empty, so it's important to finish the process and run through the entire contents of the water reservoir.
4. Let the solution soak in your Keurig
Once you've run all of the vinegar and water mixture out of the reservoir and through the coffeemaker, let what remains of the cleaning solution soak in the inner parts for about 30 minutes, but no more than three hours.
While the vinegar soaks inside of the Keurig, remove the water reservoir again and wash it well to get rid of any lingering white vinegar but don't dry the inside of it as you don't want lint to stick to the inside of it. If there is lint in your reservoir, it can clog your Keurig or end up in your drink.
The machine can stay plugged in while the vinegar soaks
5. Run a few rinse cycles with water
Reassemble your Keurig and fill the water reservoir with fresh water this time. Run a few cycles with just water to rinse all the white vinegar out from inside the coffee maker. Keurig recommends about 12 cycles of just water after descaling.
FAQ
How often should you clean your Keurig coffeemaker?
How often you use your Keurig will help determine how often you should clean it. Keurig recommends washing your water reservoir weekly and descaling your machine every three to six months.
Why are there lingering tastes from past brew cycles?
If you find that taste from past cups transfers into fresh brews, you may benefit from running rinse cycles in between cups. This is especially helpful if you brew different drinks like hot cocoa or tea.
What are the signs that I need to clean my Keurig?
Watch for signs that your coffeemaker needs a deep clean:
- Lingering tastes from past brews that won't go away with rinsing cycles
- Granules in your brewed mug
- Foul or mildewy smells
- Slow water trickle
- Mineral buildup on machine
- Descale prompt is on
- Machine takes too long to fill a cup or doesn't fill it all the way
What do I do if I have hard water?
If mineral buildup is an issue with your Keurig, you may consider using filtered water in your reservoir instead of water straight from the tap. Some people also skip the filter on their Keurig, but if you have hard water, a filter is vital.
Hard water can cause mineral buildup that can affect the taste of your coffee and performance of the machine.
How can you clean the Keurig without vinegar?
While running the rinse cycles in this process will get rid of the white vinegar inside the brewer, Keurig offers a descaling solution to remove mineral buildup that is an odorless alternative to white vinegar.