'ZDNET Recommends': What exactly does it mean?
ZDNET's recommendations are based on many hours of testing, research, and comparison shopping. We gather data from the best available sources, including vendor and retailer listings as well as other relevant and independent reviews sites. And we pore over customer reviews to find out what matters to real people who already own and use the products and services we’re assessing.
When you click through from our site to a retailer and buy a product or service, we may earn affiliate commissions. This helps support our work, but does not affect what we cover or how, and it does not affect the price you pay. Neither ZDNET nor the author are compensated for these independent reviews. Indeed, we follow strict guidelines that ensure our editorial content is never influenced by advertisers.
ZDNET's editorial team writes on behalf of you, our reader. Our goal is to deliver the most accurate information and the most knowledgeable advice possible in order to help you make smarter buying decisions on tech gear and a wide array of products and services. Our editors thoroughly review and fact-check every article to ensure that our content meets the highest standards. If we have made an error or published misleading information, we will correct or clarify the article. If you see inaccuracies in our content, please report the mistake via this form.
The best cooler for Raspberry Pi power users

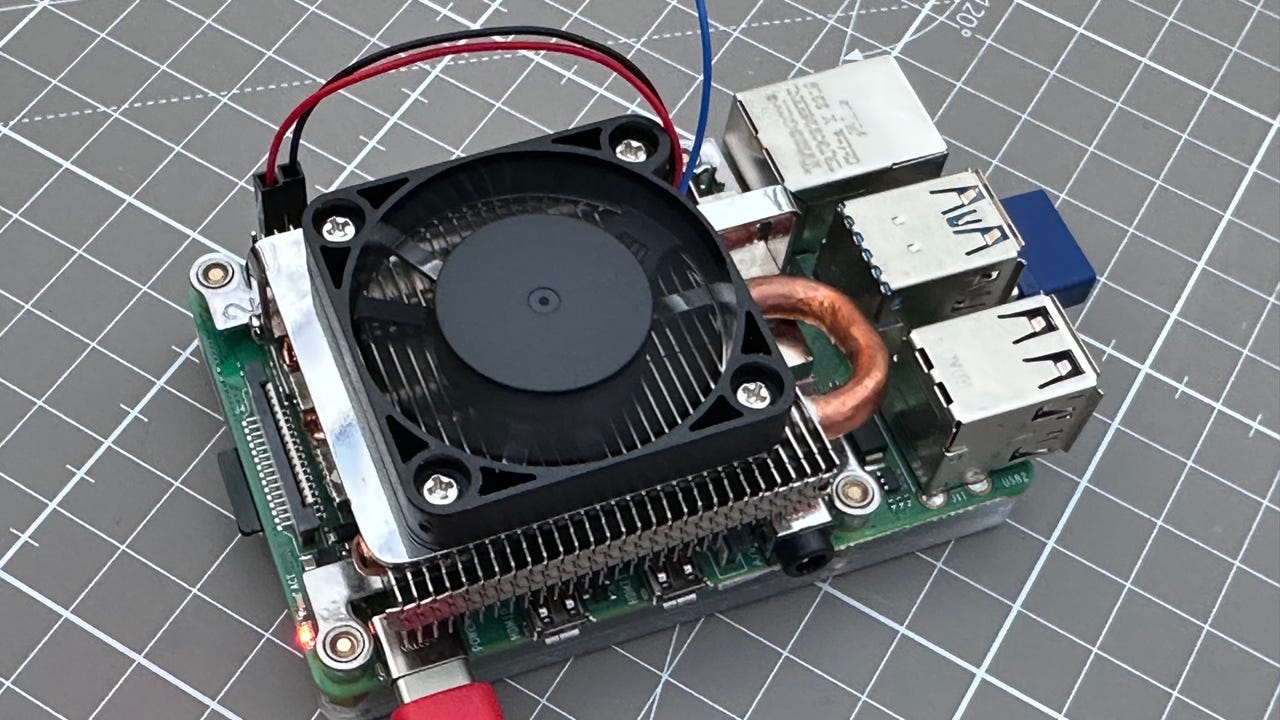
Raspberry Pi Ultra Thin ICE Tower Cooler
If you push your Raspberry Pi to the limits, then you are going to come across issues relating to overheating. While sticking passive heatsinks onto the chips is enough for most, serious overclockers are going to need serious cooling.
Also: How to overclock your Raspberry Pi
But what's the best possible cooler out there? Well, I've tested about a dozen of the most popular Raspberry Pi coolers, and narrowed the field down to one – the Raspberry Pi Ultra Thin ICE Tower Cooler.
Raspberry Pi Ultra Thin ICE Tower Cooler tech specs
- Ultra-thin cooler
- Copper heat-pipe technology
- 40mm 5400 RPM low-noise fan
- Support fan speed regulation
- Supplied with 1 x Ultra Thin ICE Tower Cooler, 4 x stand-off screws, 4 x screws, 1 x screwdriver, 4 x thermal pads, 1 x acrylic base
Also: Raspberry Pi: Where to buy the hard-to-find latest model and its alternatives
Fitting the Ultra Thin ICE Tower Cooler is easy.
1. Fit the thermal pads
Apply thermal pads to the four chips on the board (the thermal pads have a removable film on both sides that needs to be removed or your thermal pads won't work and will cause more overheating).
Applying thermal pads
2. Attach the cooler
Screw down the fan using a 4.5mm nut driver (not included, you can use your fingers as you don't need to overtighten these). The driver I used here came from the excellent iFixit Pro Tech Toolkit.
Fitting the fan
3. Fit the base
Screw down the acrylic base plate. The screws thread into the brass stand-off screws used to attach the fan.
Screwing down the acrylic base
4. Wire up the fan
Connect the red wire to GPIO pin 4 (second pin along on the top row), and the black wire to pin 6 (third pin along on the top row).
Wiring up the fan
If you plan to use fan controlling software, the blue wire attaches to GPIO pin 6 (fourth pin along on the top row).
Wiring the optional fan speed control wire
5. Change the orientation of the fan (optional)
The fan can be removed and reattached in a different orientation if you need to change the position of the wires. This is easily done by undoing the four screws holding the fan down and refitting it in a different orientation.
How good is this cooler?
Good.
Very good.
I used the stress-testing tool Stressberry to push a Raspberry Pi 4 Model B to the limit. Yo can get more information on how to install and run Stressberry here.
Running Stressberry on a Raspberry Pi
I carried out a number of stress tests, and here are the output charts showing how hot the Raspberry Pi got.
The first test is of an uncooled Raspberry Pi running at the stock speed.
Peak temperature: 67°C/152°F
Uncooled Raspberry Pi running at the stock speed
Next up, an uncooled Raspberry Pi overclocked to 2000MHz.
Peak temperature: 83°C/181°F
Uncooled Raspberry Pi overclocked to 2000MHz
Next up, a Raspberry Pi 4 running at stock speed in an Armor Case with dual cooling fans running.
Peak temperature: 49°C/120°F
Raspberry Pi 4 running at stock speed in an Armor Case with dual cooling fans running
Note: I tried to run the Raspberry Pi with a 2200MHz overclock both with no cooling and in the Armor Case, but this was unsuccessful, with the Raspberry Pi crashing.
OK, let's test the Ultra Thin ICE Tower Cooler with the Raspberry Pi overclocked to 2000MHz.
Peak temperature: 41°C/106°F
Ultra Thin ICE Tower Cooler with the Raspberry Pi overclocked to 2000MHz
Next, the Ultra Thin ICE Tower Cooler with the Raspberry Pi overclocked to 2200MHz.
Peak temperature: 45°C/113°F
So, the Ultra Thin ICE Tower Cooler can keep a Raspberry Pi overclocked to 2200MHz cooler than an uncooled Raspberry Pi running at stock speeds.
Absolutely stellar performance for a cooler that costs $16!
Highly recommended for Raspberry Pi power users.